Pressing Surface
A good and stable ironing surface is a must for quilters of every sort. But, the cost of custom made boards can make a girl think twice. So why not build one yourself? Actually, making your own custom board is a piece of cake when you get right down to it. With a few tools and the help of your local hardware person you can have a nice, hard, pressing surface that will give you years of service.
Materials:
- 3/4″ pressed wood or plywood (Mary suggests 1/2” is sufficient and lighter)
- Cotton batting
- Muslin or other light cotton fabric
- staple gun
- scissors
1. Determine the size board you would like. The board featured measures 36″ x 29″ and fits nicely on a tabletop. (44” provides a surface large enough for width of fabric)
2. Go to your local hardware store and ask to have your board cut to size. You will probably have enough wood left over to make another ironing board for a friend.
3. Cut two layers of batting large enough to fold around to the underside of the board on all four sides. Center the two batting layers on the board; folding to the back and tacking in place with a few staples.
4. Cut the muslin fabric large enough to fold around to the underside of the board on all four sides. Center the batting over the batting. Fold muslin to the underside and tack in place on one side. On the opposite side pull muslin taught and tack in place along the underside (wait to tack corner later).
5. Repeat with other two sides.
6. Pull in corners and tack in place. Cut any excess fabric and batting away.
You now have your own custom ironing board ready to go. As the top gets stained just add another layer of muslin.
Mary also applied ‘rails’ on the underside the width of the ironing board apart (made from broken hockey sticks) to keep the board in position on the ironing board.
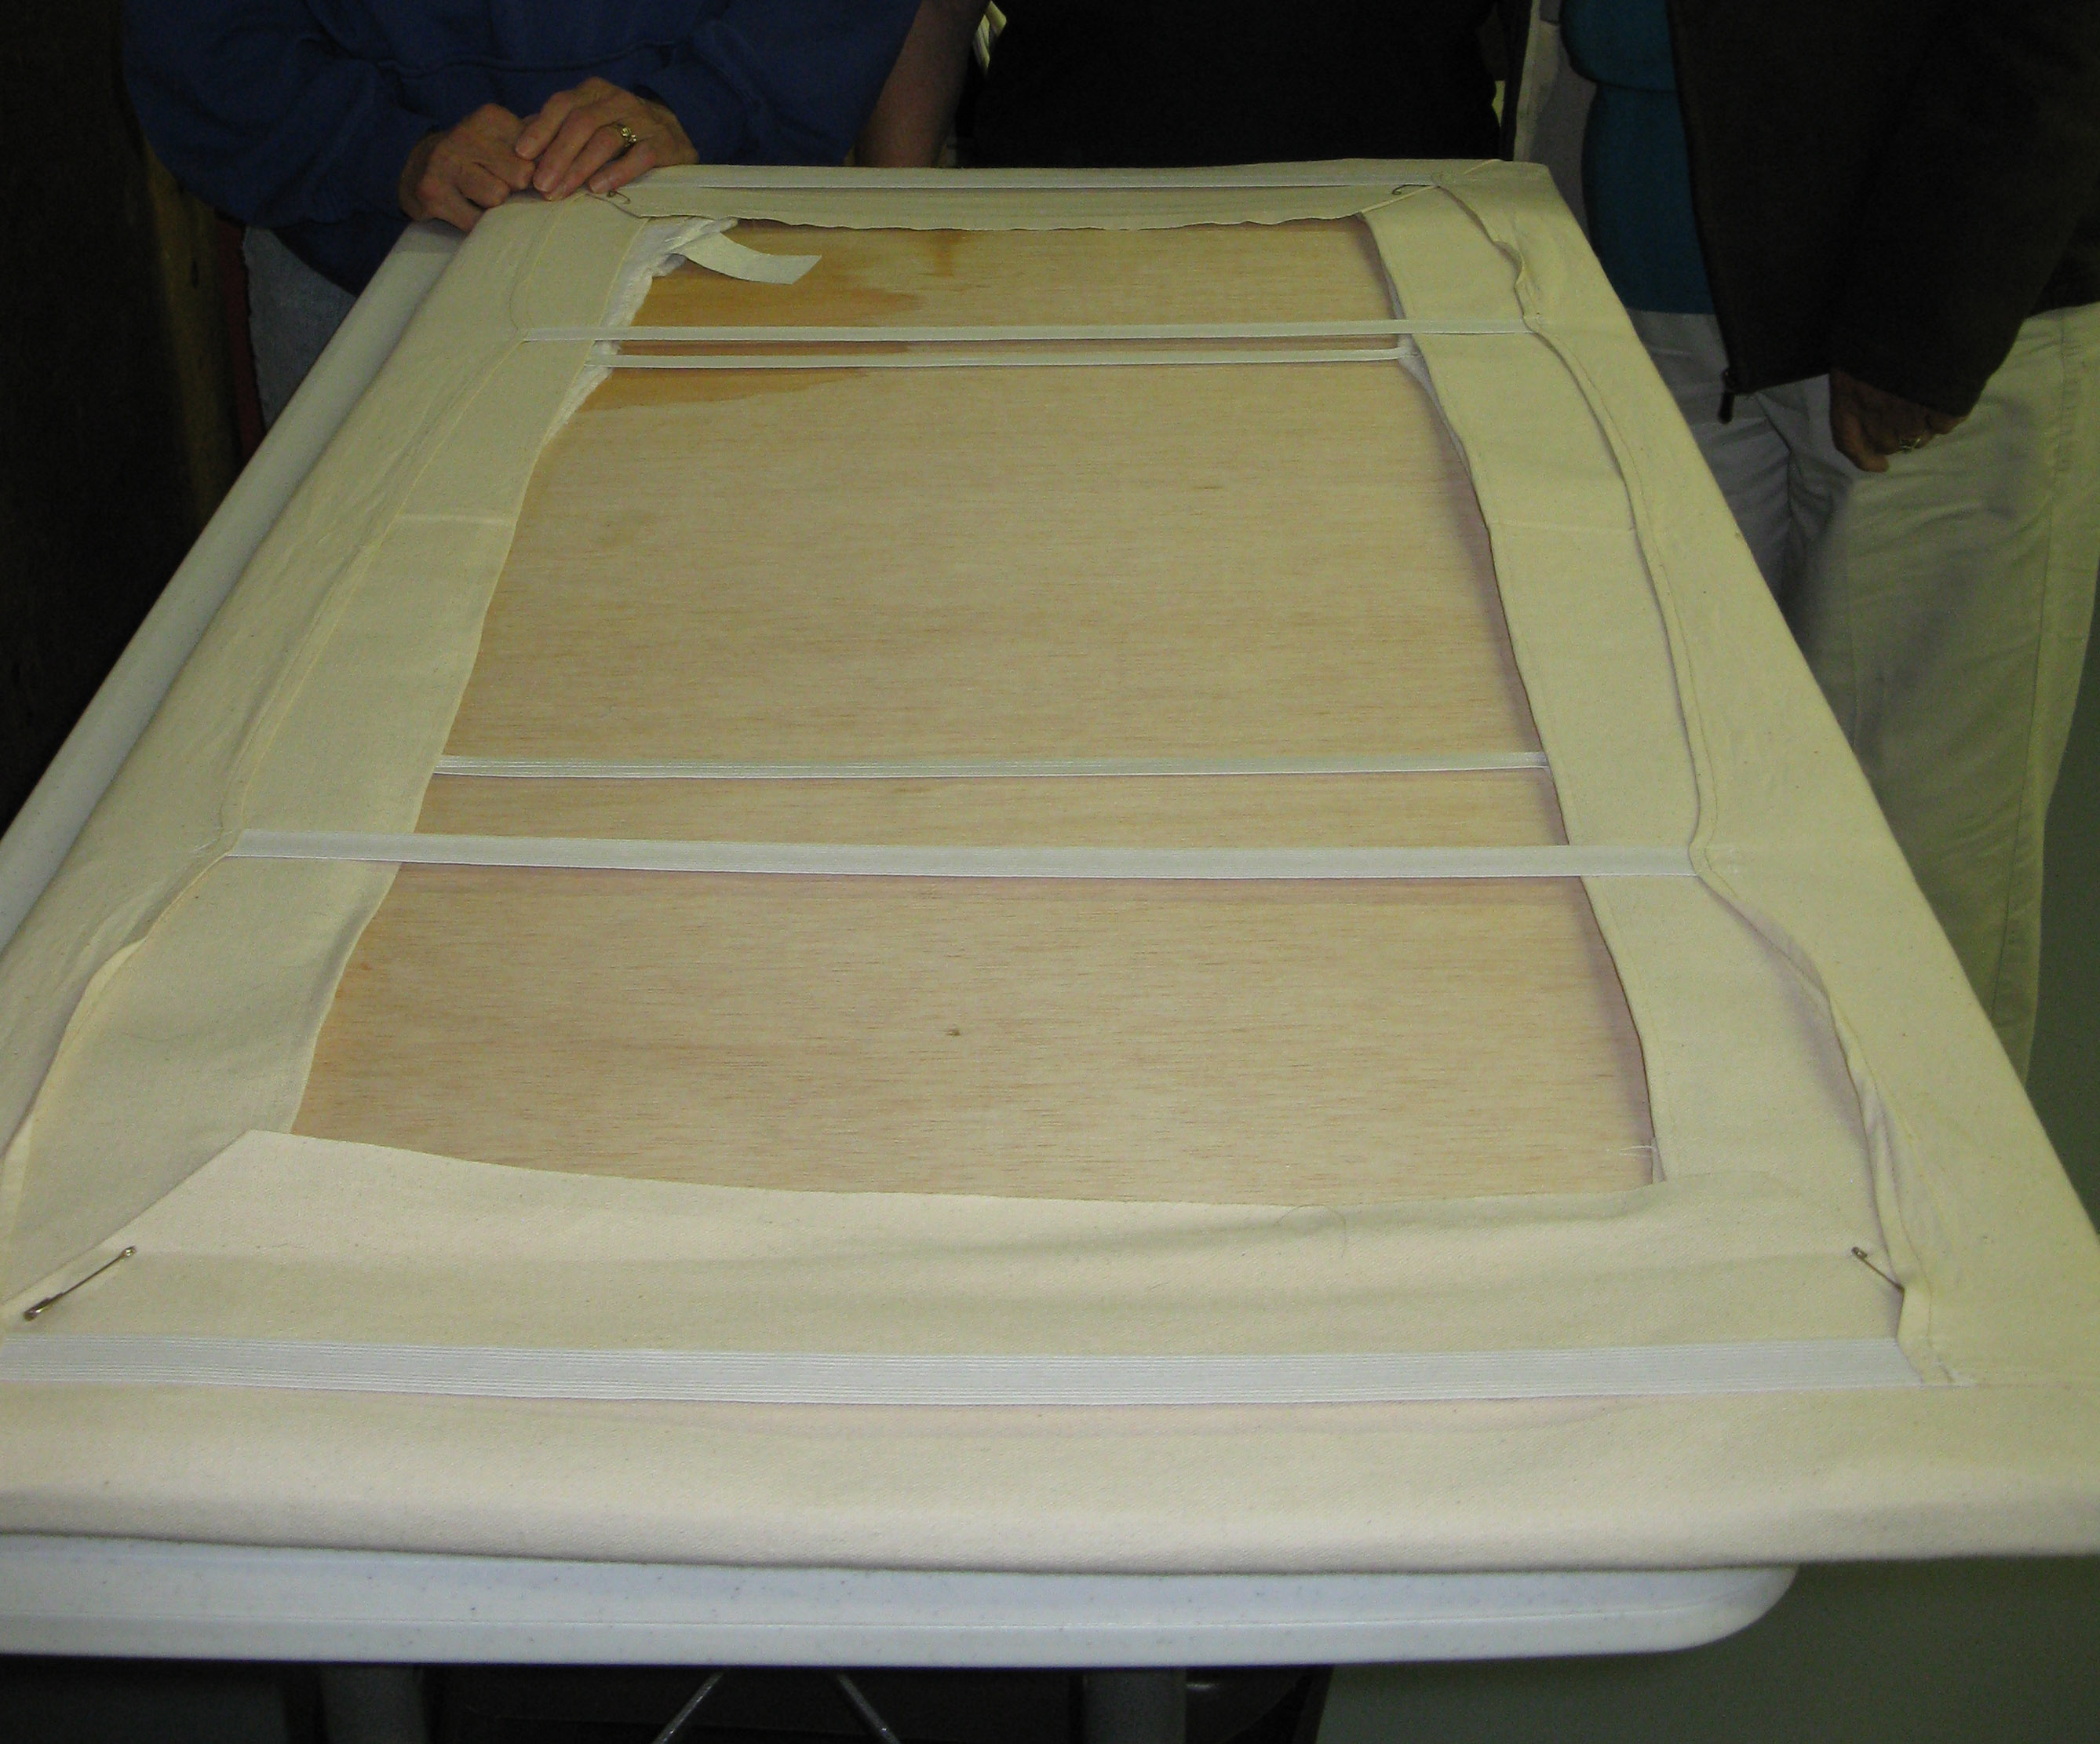
Example of the underside of a neatly finished pressing board with removable muslin cover.
_____________________
Many fabric companies release free patterns for download to promote new lines of fabric. Here are a whole bunch (132 at time of writing) from Robert Kaufman Fabrics!
And some from the Fat Quarter Shop
_____________________
Not sure what to do with orphan blocks?
Here’s a great tutorial for turning them into Rice Heating Bags
 from modifytradition blog
_____________________
How about this clever idea for storing your ‘works in progress’:

Check out the ‘how to’ here.
________________
From Quilting Art Magazine:

Make a cute pin cushion using a bottle cap. Click here for instructions.
———————————————–
Here’s a fresh decorating idea from Cloth Paper Scissors Magazine.
Click on the image for pattern instructions.

From thequiltshow.com newsletter:
Tip of the Week: Follow “The Rules of the Road”
Machine quilting can seem daunting to the inexperienced, but if you keep the learning curve in perspective, you can avoid much of the anticipated frustration and trauma. Joanie Zeier Poole has been teaching machine quilting for many years, and she has found that many of the same skills necessary for learning to drive can also be applied to machine quilting. We thought we’d share a few “rules of the road” (aka tips!) from her new book, Quiltining Elements, to help you gain experience and build confidence while relieving stress as you practice your machine quilting:
1. Study the map before you take off to know where you are going.
2. Don’t stare at the hood ornament; look ahead down the road.
3. Slow down and proceed with caution when encountering a curve or busy intersection.
4. There will be penalties for speeding and for making U-turns in unauthorized areas.
5. If you intend to stop, remember to take your foot off the gas.